
In the previous example we have seen how to manually deploy with Docker a Node.js microservice to interact with Redis.
Now let’s see how to simplify the deploy of this app using Docker Compose.
We will also take the opportunity to see how Redis persistence works.
To try this example on your PC you only need to install Docker Desktop and Node.js then follow the described steps.
Create a directory for this example and inside create two directories, one for the Node.js microservice and the other for Redis.
mkdir node-redis-example-2
cd node-redis-example-2
mkdir webservice
mkdir redis-server
Copy the microservice files from its repository to the webservice directory, then create a Dockerfile inside redis-server directory.
FROM redis:alpine

COPY redis.conf /redis.conf
COPY run.sh /run.sh

CMD [ "/run.sh" ]
ENTRYPOINT [ "sh", "-c" ]
Create the run.sh file inside the redis-server.
It will start Redis using our custom redis.conf file.
echo "Starting Redis with config file..."
redis-server /redis.conf
Download the Redis tar.gz file from the official website, extract the redis.conf from it and copy it inside the redis-server directory.
Now we have to find in redis.conf some settings and change them like this.
#Comment this line
#bind 127.0.0.1

#And disable proteced mode, so the microservice can connect
protected-mode no

#Comment the default save settings for RDB
#And just set for this example to save every 5 seconds for only 1 operation
save 5 1
#save 300 10
#save 60 10000

#Change the dir setting to save Redis persistence backup files in a directory of our machine
dir ../redis-data

#Turn on AOF
appendonly yes
Create the docker-compose.yml file inside the directory of the project.
It will describe our application, with two Docker container, one for the Node.js microservice and one for Redis.
version: "3.8"

services:
  webservice:
    build: ./webservice
    environment:
      - REDIS_SERVER_IP=redis-server
    ports:
      - "3000:3000"
  redis-server:
    build: ./redis-server
    volumes:
      - /mnt/c/redis-data:/redis-data
Create on your machine the redis-data directory that will be mounted to the redis-data directory of the Redis container.
mkdir redis-data
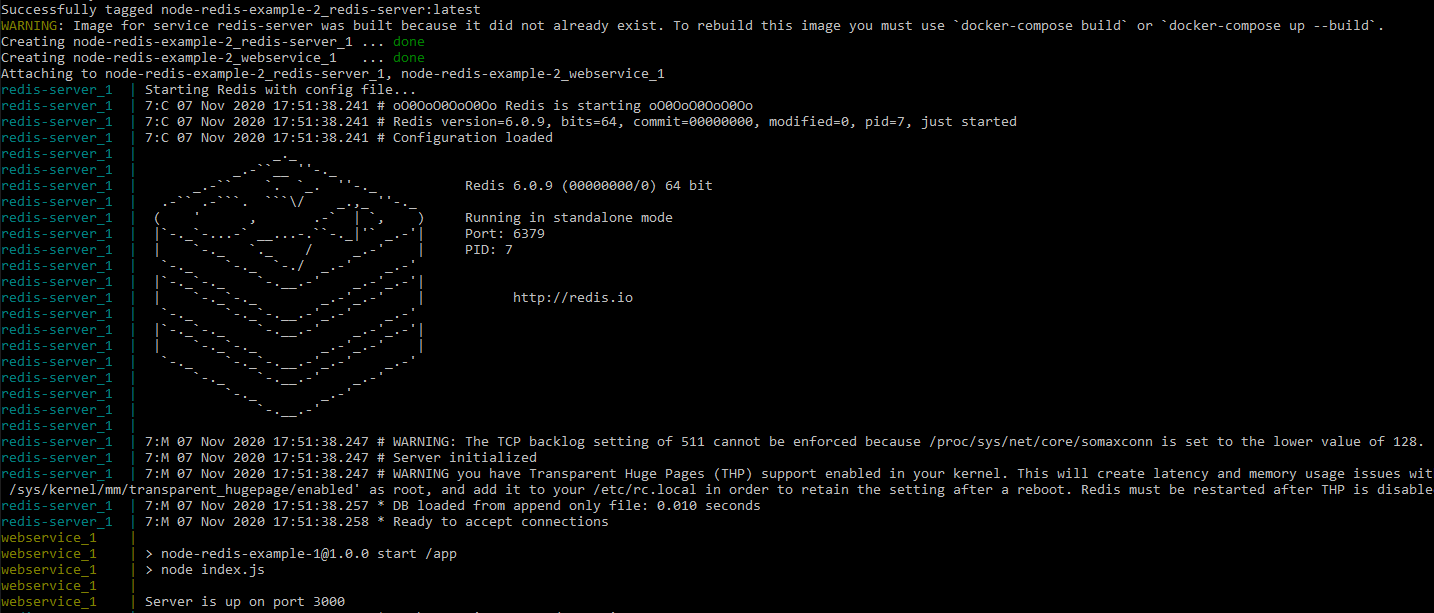
Deploy and start your app using Docker Compose from inside the project directory.
docker-compose up
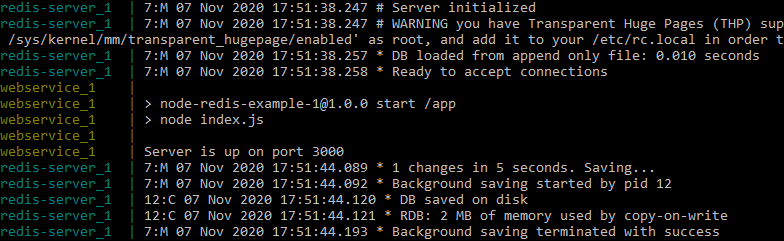
You will then be able to see the logs of your Docker Compose app.
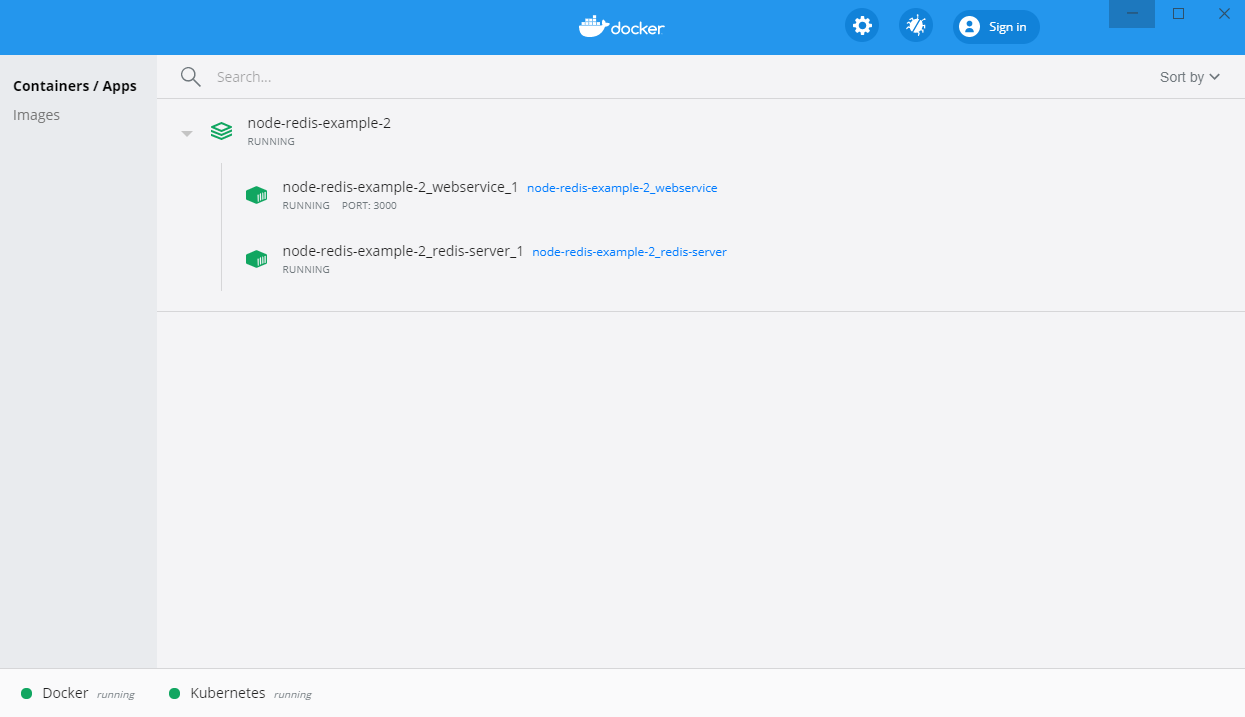
And in the Docker Desktop dashboard you can see your Docker Compose app running with its two containers.
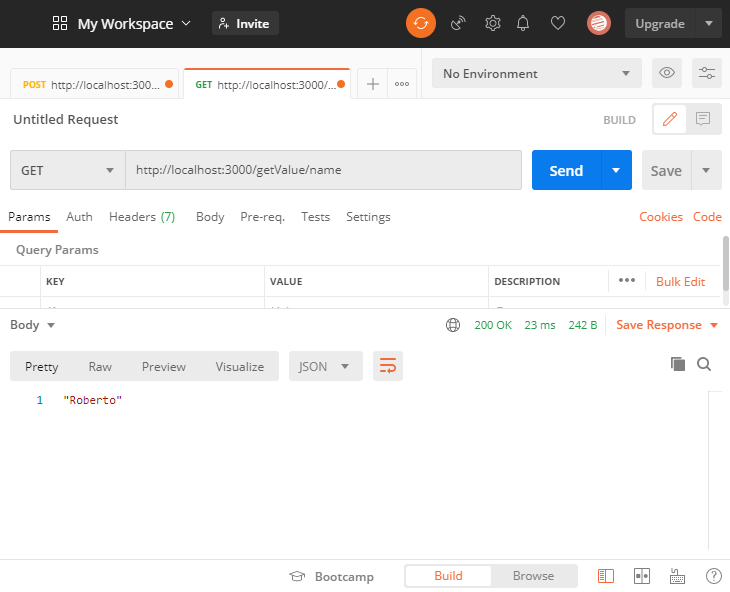
Now, as in the previous example, just using Postman we can now try to set a key value pair.

And then retrieve the saved value through its key.
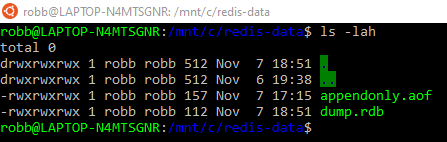
Now we can see that Redis created the dump.rdb and appendonly.aof files in the redis-data directory of our machine.
Try to turn off our application, even deleting the containers and then turn up it again.
docker-compose down --remove-orphans
docker image prune -a
docker-compose up
You will not lost your data, because Redis automatically will rebuild its database using these files.
So if you try again to retrieve the saved value through its key, you will get it as if the app has never stopped.
You can find the source code on this GitHub repository:
https://github.com/robertobandini/node-redis-example-2
It also includes the Postman collection used and and a sw-version.txt file to specify the softwares used for this project and their versions.
In the next post I’ll talk about how to deploy, managing and resizing this app via Kubernetes.