
In the previous examples we used Kubernetes with Docker Desktop for an application composed of Node.js microservices and a Redis database.
In this post we see a simple example about how we can create our Kubernetes cluster with three CentOS 8 virtual machines provided by Amazon AWS EC2.
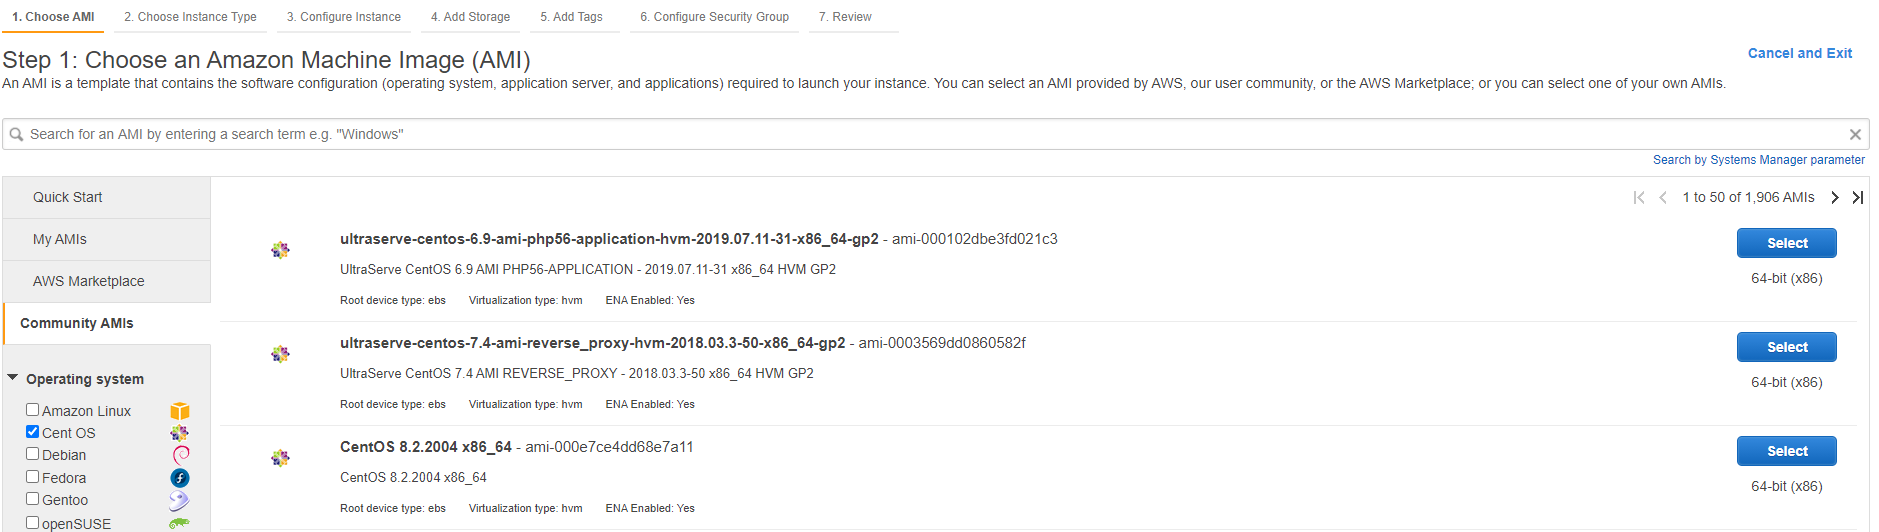
Go to your EC2 Dashboard click on the “Launch instance” button and choose CentOS 8 from Community AMIs.
Choose the t2.medium instance type, to meet the minimum Kubernetes kubeadm requirements, then set the default subnet and the default security group, to create 3 identical instances.
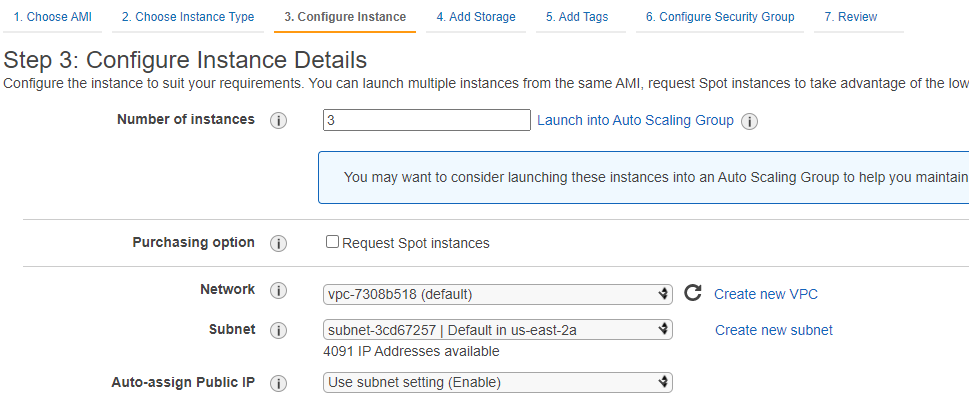
Create and add to them a key pair, then wait until they are running and the checks are passed.

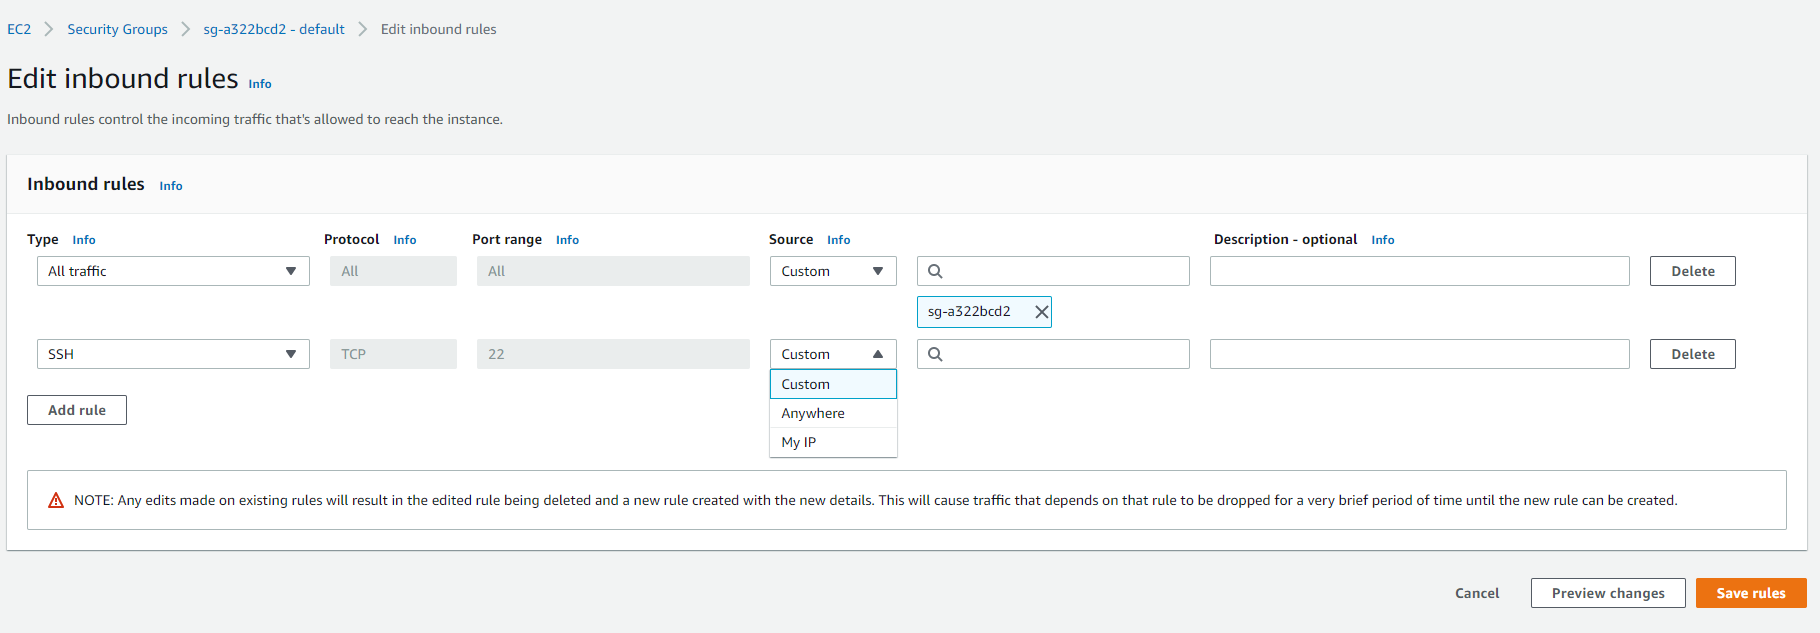
Configure the rules on the security group to let you connect via SSH to the instances (My IP) and to let them access each other for Kubernetes default security group name.
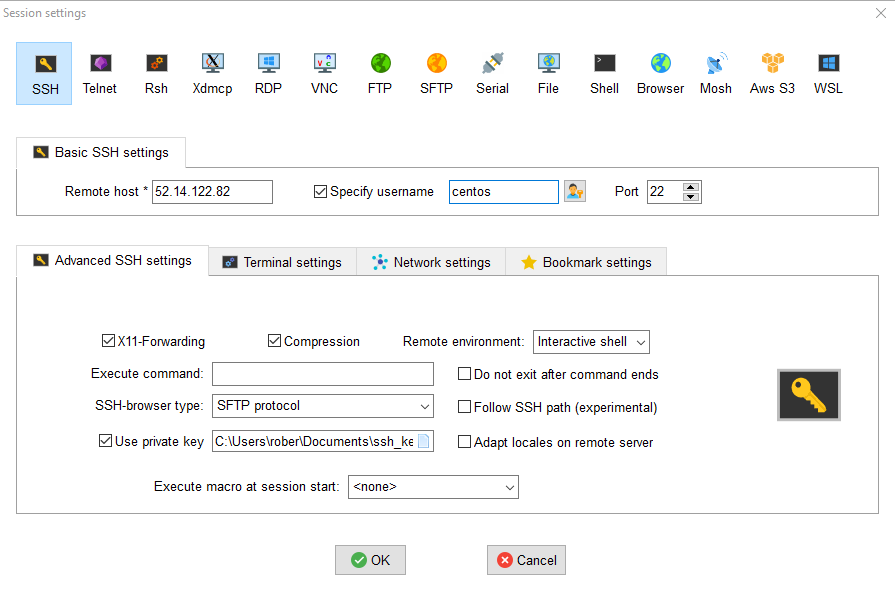
Use the key to connect through SSH to all the three instances and use the following commands on each of them, to install Docker CE and then Kubernetes.
The following image is just an example of using MobaXterm on Windows 10 for this purpose.
We start with Docker CE, installing required packages.
sudo yum install -y yum-utils device-mapper-persistent-data lvm2
Add the Docker repository.
sudo yum-config-manager --add-repo https://download.docker.com/linux/centos/docker-ce.repo
Install Docker CE.
sudo yum update -y && sudo yum install -y docker-ce docker-ce-cli containerd.io
Create the /etc/docker directory.
sudo mkdir /etc/docker
Set up the Docker daemon.
cat <<EOF | sudo tee /etc/docker/daemon.json
{
  "exec-opts": ["native.cgroupdriver=systemd"],
  "log-driver": "json-file",
  "log-opts": {
    "max-size": "100m"
  },
  "storage-driver": "overlay2",
  "storage-opts": [
    "overlay2.override_kernel_check=true"
  ]
}
EOF
Create /etc/systemd/system/docker.service.d.
sudo mkdir -p /etc/systemd/system/docker.service.d
Restart Docker and enable it as a service.
sudo systemctl daemon-reload
sudo systemctl restart docker
sudo systemctl enable docker
Testing Docker installation.
sudo docker version
Continue with Kubernetes, ensure net.bridge.bridge-nf-call-iptables is set to 1 in your sysctl config.
cat <<EOF | sudo tee /etc/sysctl.d/k8s.conf
net.bridge.bridge-nf-call-ip6tables = 1
net.bridge.bridge-nf-call-iptables = 1
EOF

sudo sysctl --system
Install kubeadm, kubelet and kubectl.
cat <<EOF | sudo tee /etc/yum.repos.d/kubernetes.repo
[kubernetes]
name=Kubernetes
baseurl=https://packages.cloud.google.com/yum/repos/kubernetes-el7-\$basearch
enabled=1
gpgcheck=1
repo_gpgcheck=1
gpgkey=https://packages.cloud.google.com/yum/doc/yum-key.gpg https://packages.cloud.google.com/yum/doc/rpm-package-key.gpg
exclude=kubelet kubeadm kubectl
EOF

sudo setenforce 0

sudo sed -i 's/^SELINUX=enforcing$/SELINUX=permissive/' /etc/selinux/config

sudo yum install -y kubelet kubeadm kubectl --disableexcludes=kubernetes

sudo systemctl enable --now kubelet
sudo systemctl daemon-reload
sudo systemctl restart kubelet
Now we can setup the cluster, using one instance as master node and the others as slave nodes.
On the machine choosen as master we initialize the Kubernetes control-plane through kubeadm.
sudo kubeadm init --pod-network-cidr=192.168.0.0/16
Let kubectl works for your non-root user.
mkdir -p $HOME/.kube
sudo cp -i /etc/kubernetes/admin.conf $HOME/.kube/config
sudo chown $(id -u):$(id -g) $HOME/.kube/config
Use on the other instance the command showed by kudeadm at the end of the setup to let them join the Kubernetes cluster, for example:
sudo kubeadm join 172.31.1.234:6443 --token ksksek.qa3663rqxrv8wgpk \
    --discovery-token-ca-cert-hash sha256:cd1d9be85ed97fac464eb32172030936025309f51db8a2e411c0c97fb679345e
Come back to the master instance to install a pod network add-on, download the Calico networking manifest for the Kubernetes API datastore.
curl https://docs.projectcalico.org/manifests/calico.yaml -O
Apply the Calico networking manifest.
kubectl apply -f calico.yaml
Install calicoctl as a Kubernetes pod Kubernetes API, datastore case.
kubectl apply -f https://docs.projectcalico.org/manifests/calicoctl.yaml
Setting an alias to use calicoctl and test it.
alias calicoctl="kubectl exec -i -n kube-system calicoctl -- /calicoctl"
calicoctl get profiles -o wide
We can now start to use our custom cluster, deploying an application.
For example in a nexts posts we will see how to install a Docker Registry and use it to deploy the Node.js/Redis application that we have seen in the previous examples.