In this post we see how to install Portainer in a Kubernetes custom cluster.
To do this we use AWS EC2 to create our self-made Kubernetes cluster. Then we have to create first a local storage class provisioner through sig-storage-local-static-provisioner, because Portainer requires data persistence, as specified in its documentation.
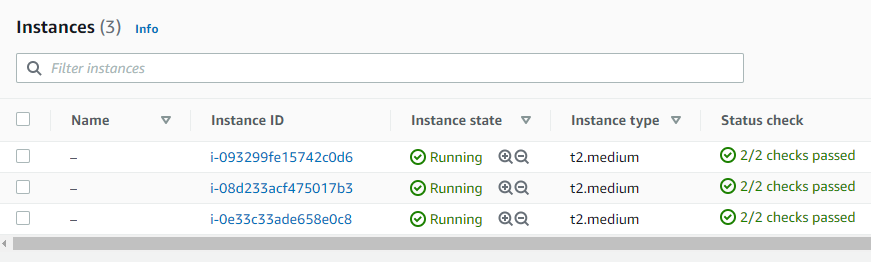
Create your custom Kubernetes cluster following instructions of my previous post “How to create a Kubernetes cluster using Amazon AWS EC2”.
Install Helm on the master node.
cd $HOME
curl -L -O https://get.helm.sh/helm-v3.4.2-linux-amd64.tar.gz
mkdir helm
tar -xvzf helm-v3.4.2-linux-amd64.tar.gz -C helm
sudo ln -s $HOME/helm/linux-amd64/helm /usr/local/bin/helm
Install Git.
sudo dnf install git
Clone the sig-storage-local-static-provisioner repository.
sudo dnf install git
cd $HOME
git clone https://github.com/kubernetes-sigs/sig-storage-local-static-provisioner.git
Settings for raw local block feature.
export KUBE_FEATURE_GATES="BlockVolume=true"
Create some directories and mount them as if they were disks, on slave nodes.
sudo mkdir $HOME/disks
sudo mkdir $HOME/disks/vol1

sudo mkdir /mnt/fast-disks
sudo mkdir /mnt/fast-disks/vol1

sudo mount --bind $HOME/disks/vol1/ /mnt/fast-disks/vol1
Back to the master node to create the storage class.
cd $HOME/sig-storage-local-static-provisioner
kubectl create -f deployment/kubernetes/example/default_example_storageclass.yaml
Set the created storage class as default.
kubectl patch storageclass fast-disks -p '{"metadata": {"annotations":{"storageclass.kubernetes.io/is-default-class":"true"}}}'
You can now verify your default Kubernetes storage class.
kubectl get sc
Change the default release name.
sudo vi ./helm/provisioner/values.yaml
For example you can set “test” on both.
nameOverride: "test"
fullnameOverride: "test"
Generate the provisioner configuration.
helm template ./helm/provisioner > deployment/kubernetes/provisioner_generated.yaml
Deploy the provisioner.
kubectl create -f deployment/kubernetes/provisioner_generated.yaml
After some second you can check the generated persistent volumes.
kubectl get pv
Add the Portainer Helm repository.
helm repo add portainer https://portainer.github.io/k8s/
Create a Kubernetes namespace for Portainer.
kubectl create namespace portainer
Install Portainer with NodePort mode.
helm install -n portainer portainer portainer/portainer
Get the application URL.
export NODE_PORT=$(kubectl get --namespace portainer -o jsonpath="{.spec.ports[0].nodePort}" services portainer)
export NODE_IP=$(kubectl get nodes --namespace portainer -o jsonpath="{.items[0].status.addresses[0].address}")
echo http://$NODE_IP:$NODE_PORT
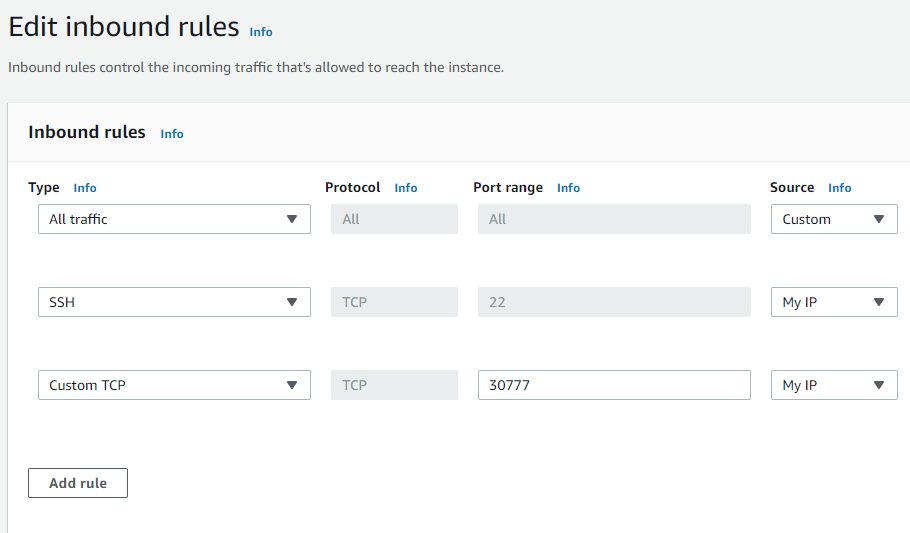
Open the Portainer NodePort 30777 in the AWS EC2 security group.
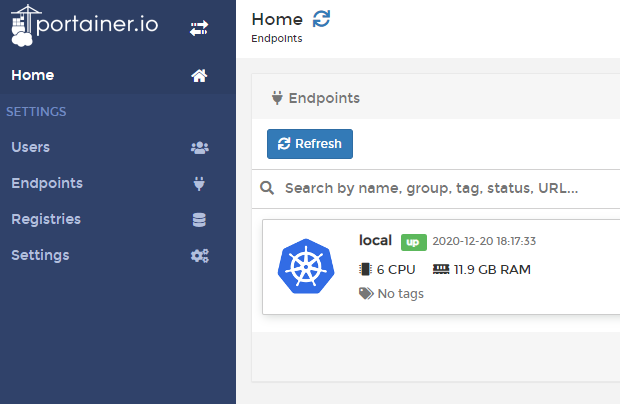
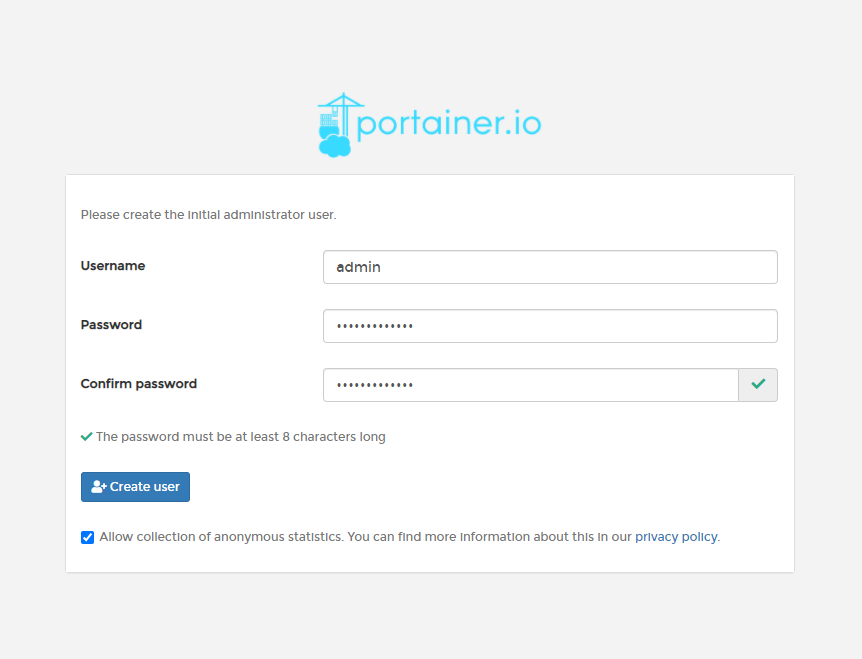
Use the public IP of the master node VM in your browser to setup.
Enable your storage class and confirm Portainer settings.

You can now start to use Portainer on your custom Kubernetes cluster.